- Presentations

Online Presentation Maker for Engaging Presentations
Create Your Presentation

- Online presentation maker with 900+ slide layouts.
- Millions of images, icons and graphics to choose from.
- Dozens of chart types to visualize data and numbers.

Chosen by brands large and small
Our presentation maker is used by over 27,500,000 marketers, communicators, executives and educators from over 133 countries that include:
EASY TO EDIT
Presentation Templates
Avoid the trouble of having to search for just the right template or create your own slide design from scratch by tapping into our library of more than 900 slide design layouts for practically every content need, from diagrams, charts and maps to image collages and quote slides.

Create your presentation View more templates
Features of the Presentation Maker
Beautiful presentation themes.
Choose from one of our presentation themes with hundreds of available slide layouts for you to pick from and build a beautiful presentation. Find slide layouts to fit any type of information you need to communicate within your presentation and customize them to perfectly fit your brand or topic.

Build your presentation
With fully customizable slides, text blocks, data visualization tools, photos and icons to help tell your story, you can easily build creative and cool presentations as quickly as you need. Build the perfect slides with Visme’s easy-to-use presentation editor.

Customize every aspect of your presentation with your own images and text
Choose from over a million images, thousands of icons, dozens of charts and data widgets to visualize information in an engaging way. Apply a color scheme to all your slides with one click. Add animation effects, transitions, interactivity, pop-ups, rollovers and third-party content such as live websites and social media feeds.

Record yourself presenting
Once you’ve created your presentation, do more than only share or download it. With Visme’s Presenter Studio, you can record your presentation and share it with your audience.
- Record your screen, audio, and video, or switch off your camera for an audio-only presentation.
- Present asynchronously on your own time, at your own pace. Let your colleagues watch it at their convenience.
More Great Features of the Presentation Maker
- Stunning presentation themes and premade templates
- Millions of stock photos and icons to choose from
- Input your brand fonts and colors to create branded company content
- Easy drag-and-drop design tools, made with the non-designer in mind
- Search for slide layouts that match your presentation content
- Easily present online or share with your peers
Share Your Presentation
Visme makes it easy to create and share presentations online. Our presentation software allows you to present online by generating a link to access your presentation, share privately by sending a password protected link to friends and colleagues, or even turn your presentation into a lead generation tool by requiring email sign-in before viewing.

LEARN ABOUT PRESENTATIONS
What is a Presentation ?
A presentation is a sequence of slides that tell a story or teach an audience about a topic. These are often used in business as ways of demonstrating something and in the classroom as teaching aids. While PowerPoint long dominated the presentation industry, Visme’s free online presentation maker allows you to create even more beautiful and engaging content.
With Visme's engaging presentation maker, you can start with a template, dive into one of our themes with various slide ideas, or mix and match slides from different templates to create your own masterpiece.

Use the presentation maker to take the trouble out of presentation design.
Creating a slide deck for an important presentation can take several hours, if not days. Our free presentation maker provides a searchable slide library with 900+ layouts that you can fully customize. With so many options, you can easily find the exact slides that you need instead of searching for the right template or building a slide design from scratch.
EVERYTHING YOU NEED + MORE
More Than a Presentation Maker
Visme’s online presentation tools allow you to create an interactive online presentation that will blow your audience away. Add interactive elements, animate your slides and create a presentation that will have your viewers talking for days to come.
MAKE IT ENGAGING
Interactivity
Create interactive presentations with popup and rollover effects that allow your viewer to interact with your design to learn more information.

VISUALIZE YOUR DATA
Charts & Graphs
Share data, statistics, simple numbers and more in your presentation slides with Visme’s easy-to-use charts, graphs and other data widgets.

BEAUTIFY YOUR CONTENT
Stock Photos & Graphics
Choose from over a million stock photos, icons, illustrations, characters, lines, shapes and more to create an engaging presentation design.
HOW IT WORKS
Make Presentations in 5 Steps
Whether you’re creating a presentation to pitch your business, to inform your industry or to update your team or supervisors, you want your slideshow to be equal parts beautiful and informative. Visme makes it easy with our powerful presentation maker.
Mix and match template styles and slide ideas, customize with your own ideas, insert design elements from our asset library, present online with presenter notes and more.
- Sign up for free or log into your Visme account and create a new project.
- Choose one of our beautiful themes under the Presentations content category or select a pre-designed presentation template.
- Add new slides from our theme library to help guide your presentation design.
- Customize text boxes, fonts, colors, photos, icons, charts, data visualization tools and so much more within your slides.
- Quickly and easily share or present your slideshow by clicking Share in the top navigation bar and viewing our share options.
How to Use the Presentation Maker
Before creating your slide deck, make sure to create an outline with all the major points that you need to include within your presentation.
Start creating your slides. You can easily use our free presentation slides and templates to help you create a well-designed and informative presentation.
Easily replace any image with millions of free images within our editor, as well as diagrams, charts, icons, illustrations and maps.
Insert your own text by clicking on any text box and typing in your own information (or you can simply copy and paste it from your outline).
Our free presentation maker online also comes with built-in animation effects. Add transitions, audio, pop-ups, rollovers and interactive buttons to wow your audience.
Use the Presenter View to rehearse your delivery. Use the timer to make sure you don’t go over the allotted time. You can easily add presenter notes that only you will see while you present.
Generate a public or private URL to share with anyone or embed your slide deck on your website or blog by clicking the Share button in the Visme editor.
Download as an editable PowerPoint or in HTML5 to keep all of your animations and interactivity intact for offline presenting.
Who can benefit by using our presentation maker?
Business professionals.
- Create ready-to-use presentations instantly for important meetings or pitches
- Save time from designing and let AI do the work for you
- Customize templates to match your brand or industry
- Create interactive slides that keep your students engaged through sessions
- Break down complex topics with informative and fun presentations
- Design educational presentations in minutes, not hours
Sales Teams
- Create a library of customizable templates for team members to use
- Design slides that professionally showcase your products and services
- Customize presentations to suit different prospects and sales use cases
Consultants
- Generate presentations that will impress VCs and investors
- Use data-driven design to get the best presentation design options
- Create presentations that are built with your brand and mission in mind
Event Planners
- Design presentations to outline event schedules, details and budgets
- Generate easy-to-follow slides so teams are informed on event details or changes
- Prepare persuasive sponsorship decks without any design skills
- Save time and quickly craft client and prospect presentations
- Add strategies and recommendations with minimal design effort
- Customize each presentation to your client's branding
Questions About the Presentation Maker
How can i create an account with visme, how much does it cost to create a presentation with the presentation maker app, can i create animated projects, is it possible to make interactive projects with the presentation maker, how do i present my slide deck, how can i create a slide deck in a few minutes, what our users say about us.
“After trying tools like Canva and Adobe Spark, we picked Visme. Nothing else matched the flexibility, capabilities or ease of use.”
“Visme is cost efficient and helps in saving time. As a small organization, we have limited resources, and Visme has been a good solution for that.”
Your presentations deserve to be beautiful and so does the rest of your content
Sign Up Free
Get started with Slides in Google Workspace
Create your first presentation in slides.
On this page
Create or import a presentation, add slides to your presentation.
- Update your presentation
Want advanced Google Workspace features for your business?
Try Google Workspace today!
Create your presentation
- Open the Slides home screen at Google Slides .
You can also create new presentations from the URL https://slides.google.com/create .
Import and convert an existing presentation
Converting your file from another program creates a copy of your original file in a Docs, Sheets, or Slides format. You can then edit the file in your browser.
If you have existing files, you can import and convert them to Docs, Sheets, or Slides.
- Go to Drive .
- Choose the file you want to import from your computer to add it to Drive.
Have a Microsoft file?
If you've already stored Microsoft files in Drive, you can also update them without converting them .
Add a slide with the same layout as the current slide
- On your computer, open a presentation in Google Slides .
Add a slide with a different layout
- Choose a slide.
Add a slide with your organization's branding
- At right, click the template you want to use.
Note: The Templates option appears only if your administrator makes organization-branded slides available.
Update your presentation
Choose a theme and layout.
When you first create a presentation, you can choose a theme for your slides. A theme is a preset group of colors, fonts, background, and layouts. Your presentation's layout is the way your text and images are arranged on a slide.
Change your presentation's theme
- On the right, click the theme you want.
Change the layout of your presentation
- Select a slide.
- At the top, click Layout .
- Choose the layout you want to use.
Arrange slides
Move slide —Drag the slide to a different position in the presentation. To move several slides at once, Ctrl+click multiple slides before dragging them.
Delete slide —Right-click the slide and select Delete .
Duplicate slide —Right-click the slide in the sidebar and select Duplicate slide .
Add pictures, text, speaker notes, and more
Rename your presentation —Click Untitled presentation and enter a new name.
Add videos, shapes, charts, and more —Click Insert to add videos, shapes, charts, slide numbers, and other features to your presentation. You can also move, delete, or re-size these inserted features.
Add speaker notes —Use speaker notes to keep track of your talking points for each slide. In the presentation editor, speaker notes appear beneath the current slide. When you present your slides, your speaker notes show in a separate window.
Google, Google Workspace, and related marks and logos are trademarks of Google LLC. All other company and product names are trademarks of the companies with which they are associated.
Was this helpful?
Learn how to print Learning Center guides, save them as PDFs, or customize them for your organization.
- Presentations
Make better presentations
Create exceptional slide decks in half the time using intuitive design tools and machine learning. present remotely or on-site..
Leverage the power of machine learning to improve your writing and generate content.
Looking for inspiration? Try our slide generator.
Meet your new favorite editor.
Slides is a suite of modern presentation tools, available right from your browser. Unlike traditional presentation software, there's no need to download anything. Working with collaborators to make an awe-inspiring presentation has never been easier.
Present like never before
In a meeting, conference call or on stage? With Live Present Mode, you control what your viewers see. You can even use your phone as a remote control with direct access to your speaker notes.
Work better, together
Slides for Teams makes your whole team work better. It's a secure, shared place for everything your team needs to do their best work, and includes:
- A customizable editor with your company's assets
- Media library with reusable images and videos
- Team-wide collaboration and feedback
- A theme editor that ensures everyone stays on brand
The best tool for developers
Slides is the only presentation tool with a fully open source format. Your presentations are HTML, CSS and JavaScript. Unlock advanced features, such as:
- Access to your presentation's full source code
- Rich customization options using CSS
- Export a copy and present offline or store on your own web host
Join over 2 million creators
Slides is used daily by professionals all over the world to speak at conferences, share pitches, school work, portfolios and so much more. Join today and try it out for free.
- PRO Courses Guides New Tech Help Pro Expert Videos About wikiHow Pro Upgrade Sign In
- EDIT Edit this Article
- EXPLORE Tech Help Pro About Us Random Article Quizzes Request a New Article Community Dashboard This Or That Game Happiness Hub Popular Categories Arts and Entertainment Artwork Books Movies Computers and Electronics Computers Phone Skills Technology Hacks Health Men's Health Mental Health Women's Health Relationships Dating Love Relationship Issues Hobbies and Crafts Crafts Drawing Games Education & Communication Communication Skills Personal Development Studying Personal Care and Style Fashion Hair Care Personal Hygiene Youth Personal Care School Stuff Dating All Categories Arts and Entertainment Finance and Business Home and Garden Relationship Quizzes Cars & Other Vehicles Food and Entertaining Personal Care and Style Sports and Fitness Computers and Electronics Health Pets and Animals Travel Education & Communication Hobbies and Crafts Philosophy and Religion Work World Family Life Holidays and Traditions Relationships Youth
- Browse Articles
- Learn Something New
- Quizzes Hot
- Happiness Hub
- This Or That Game
- Train Your Brain
- Explore More
- Support wikiHow
- About wikiHow
- Log in / Sign up
- Computers and Electronics
- Presentation Software
- PowerPoint Presentations
Simple Steps to Make a PowerPoint Presentation
Last Updated: July 23, 2024 Fact Checked
Creating a New PowerPoint
Creating the title slide, adding a new slide, adding content to slides, adding transitions, testing and saving your presentation.
This article was co-authored by wikiHow staff writer, Darlene Antonelli, MA . Darlene Antonelli is a Technology Writer and Editor for wikiHow. Darlene has experience teaching college courses, writing technology-related articles, and working hands-on in the technology field. She earned an MA in Writing from Rowan University in 2012 and wrote her thesis on online communities and the personalities curated in such communities. This article has been fact-checked, ensuring the accuracy of any cited facts and confirming the authority of its sources. This article has been viewed 4,345,127 times. Learn more...
Do you want to have your data in a slide show? If you have Microsoft 365, you can use PowerPoint! PowerPoint is a program that's part of the Microsoft Office suite (which you have to pay for) and is available for both Windows and Mac computers. This wikiHow teaches you how to create your own Microsoft PowerPoint presentation on a computer.
How to Make a PowerPoint Presentation
- Open the PowerPoint app, select a template and theme, then like “Create.”
- Click the text box to add your title and subtitle to create your title slide.
- Click the “Insert” tab, then “New Slide” to add another slide.
- Choose the type of slide you want to add, then add text and pictures.
- Rearrange slides by dragging them up or down in the preview box.
Things You Should Know
- Templates make it easy to create vibrant presentations no matter your skill level.
- When adding photos, you can adjust their sizes by clicking and dragging in or out from their corners.
- You can add animated transitions between slides or to individual elements like bullet points and blocks of text.

- If you don't have a Microsoft Office 365 subscription, you can use the website instead of the desktop app. Go to https://powerpoint.office.com/ to use the website version.
- You can also use the mobile app to make presentations, though it's easier to do this on a computer, which has a larger screen, a mouse, and a keyboard.

- If you don't want to use a template, just click the Blank option in the upper-left side of the page and skip to the next part.

- Skip this step if your selected template has no themes available.

- If you're creating a PowerPoint presentation for which an elaborate title slide has been requested, ignore this step.

- You can change the font and size of text used from the Home tab that's in the orange ribbon at the top of the window.

- You can also just leave this box blank if you like.

- You can also click and drag in or out one of a text box's corners to shrink or enlarge the text box.

- On a Mac, you'll click the Home tab instead. [1] X Research source

- Clicking the white slide-shaped box above this option will result in a new text slide being inserted.

- Title Slide
- Title and Content
- Section Header
- Two Content
- Content with Caption
- Picture with Caption

- Naturally, the title slide should be the first slide in your presentation, meaning that it should be the top slide in the left-hand column.

- Skip this step and the next two steps if your selected slide uses a template that doesn't have text boxes in it.

- Text boxes in PowerPoint will automatically format the bulk of your text for you (e.g., adding bullet points) based on the context of the content itself.
- You can add notes that the Presentation will not include (but you'll still be able to see them on your screen) by clicking Notes at the bottom of the slide.

- You can change the font of the selected text by clicking the current font's name and then clicking your preferred font.
- If you want to change the size of the text, click the numbered drop-down box and then click a larger or smaller number based on whether you want to enlarge or shrink the text.
- You can also change the color, bolding, italicization, underlining, and so on from here.

- Photos in particular can be enlarged or shrunk by clicking and dragging out or in one of their corners.

- Remember to keep slides uncluttered and relatively free of distractions. It's best to keep the amount of text per slide to around 33 words or less. [2] X Research source

- Slide content will animate in the order in which you assign transitions. For example, if you animate a photo on the slide and then animate the title, the photo will appear before the title.
- Make your slideshow progress automatically by setting the speed of every transition to align with your speech as well as setting each slide to Advance . [3] X Trustworthy Source Microsoft Support Technical support and product information from Microsoft. Go to source

- If you need to exit the presentation, press Esc .

- Windows - Click File , click Save , double-click This PC , select a save location, enter a name for your presentation, and click Save .
- Mac - Click File , click Save As... , enter the presentation's name in the "Save As" field, select a save location by clicking the "Where" box and clicking a folder, and click Save .
Community Q&A
- If you save your PowerPoint presentation in .pps format instead of the default .ppt format, double-clicking your PowerPoint presentation file will prompt the presentation to open directly into the slideshow view. Thanks Helpful 6 Not Helpful 0
- If you don't have Microsoft Office, you can still use Apple's Keynote program or Google Slides to create a PowerPoint presentation. Thanks Helpful 0 Not Helpful 0

- Your PowerPoint presentation (or some features in it) may not open in significantly older versions of PowerPoint. Thanks Helpful 1 Not Helpful 2
- Great PowerPoint presentations avoid placing too much text on one slide. Thanks Helpful 0 Not Helpful 0
You Might Also Like

- ↑ https://onedrive.live.com/view.aspx?resid=DBDCE00C929AA5D8!252&ithint=file%2cpptx&app=PowerPoint&authkey=!AH4O9NxcbehqzIg
- ↑ https://www.virtualsalt.com/powerpoint.htm
- ↑ https://support.microsoft.com/en-us/office/set-the-timing-and-speed-of-a-transition-c3c3c66f-4cca-4821-b8b9-7de0f3f6ead1#:~:text=To%20make%20the%20slide%20advance,effect%20on%20the%20slide%20finishes .
About This Article

- Send fan mail to authors
Reader Success Stories
Artis Holland
Sep 22, 2016
Is this article up to date?
Oct 18, 2016
Jul 23, 2016
Margery Niyi
Sep 25, 2017
Jul 21, 2016

Featured Articles

Trending Articles

Watch Articles

- Terms of Use
- Privacy Policy
- Do Not Sell or Share My Info
- Not Selling Info
Keep up with the latest tech with wikiHow's free Tech Help Newsletter
Your current User-Agent string appears to be from an automated process, if this is incorrect, please click this link:
What is Genially?
Genially is a cloud-based platform for building interactive learning and communication experiences.
Product Overview
Explore Genially's authoring and content creation features.

What's New
Discover our latest product updates and releases.

Discover how teams use Genially for eLearning, Marketing, and Communications.
K12 Schools
Explore how teachers use Genially to bring interactive learning to the classroom.
Higher Education
Discover how Learning Design teams and Faculty use Genially to build interactive courses.
Contact Sales
START CREATING
Build interactive images
Discover how to make interactive visuals and graphics.
Create interactive slides
Engage your audience with interactive slides and presentations.
Make interactive infographics
Learn how to design interactive data visualizations and diagrams.
More formats
From resumes to reports, make any kind of content interactive.
eLearning templates
Interactive resources for eLearning and corporate training courses.
K12 teaching templates
Interactive classroom resources for primary and secondary education.
Gamification templates
Escape games, quizzes, and other game-based learning activities.
Marketing templates
Interactive microsites, brochures, videos, and branding materials.
Explore all Genially templates
Browse over 1,500 pre-built designs. Save time and create professional interactive materials in minutes.

Explore Genially pricing and plans.

Plans for Teachers
Create interactive learning materials and use Genially in class with your students.

Make interactive presentations
Create show-stopping presentations and clickable slide decks with Genially’s free online presentation builder. Leave boring behind and tell a story that’s interactive, animated, and beautifully engaging.
INTERACTIVE CONTENT
A presentation that works like a website
Engage your audience with interactive slides that they can click on and explore. Add music, video, hotspots, popup windows, quiz games and interactive data visualizations in a couple of clicks. No coding required!

NO-CODE ANIMATION
Make your slides pop with animation
Bring a touch of movie magic to the screen with incredible visual effects and animated page transitions. Add click-trigger and timed animations to make any topic easy to understand and captivating to watch.

INTEGRATIONS
Live from the world wide web
Embed online content directly in your slides for a media-rich interactive experience. From YouTube and Spotify to Google Maps and Sheets, Genially works seamlessly with over 100 popular apps and websites.

TEMPLATES & TOOLKIT
Genius design tools
With Genially, anyone can create a polished and professional presentation. Choose from over 2000 pre-built templates, or create your own design using the drag-and-drop resources, color palettes, icons, maps and vector graphics.

ONLINE PLATFORM
Safe and sound in the cloud
Because Genially is online, you can relax knowing that your slides are always up-to-date. There’s no risk of forgetting to save changes or accessing the wrong file. Log in from anywhere, collaborate with your team, and make edits in real time.
All-in-one interactive presentation maker
Real-time collaboration
Co-edit slide decks with others in real time and organize all of your team projects in shared spaces.
Multi format
Present live, share the link, or download as an interactive PDF, MP4 video, JPG, HTML, or SCORM package.
Engagement Analytics
See how many people have viewed and clicked on your slides and keep tabs on learner progress with User Tracking.
Import from PPTX
Give your old decks a new lease of life by importing PowerPoint slides and transforming them with a little Genially magic.
Keep content on-brand with your logo, fonts, colors, brand assets, and team templates at your fingertips.
Quiz & Survey Builder
Use the Interactive Questions feature to add a fun quiz to your slides or gather feedback from your audience.
Beautiful templates
Make your next deck in a flash with Genially’s ready-to-use slides.

Okr shapes presentation

School notebook presentation

Animated sketch presentation

Minimal presentation

Land of magic presentation

Onboarding presentation

Visual presentation

Animated chalkboard presentation

Online Education Guide

Terrazzo presentation

Startup pitch

Historical presentation
THEMES FOR EVERYONE
Interactive presentation ideas
From classroom materials to business pitches, make an impact every day with Genially.

Education presentations

Pitch decks

Business presentations

Thesis defense
Why the world loves Genially presentations

Share anywhere
Present live
From the front of the room or behind a screen, you’ll wow your audience with Genially. Heading off grid? Download in HTML to present dynamic slides without WiFi.
Share the link
Every Genially slide deck has its own unique url, just like a website! Share the link so that others can explore at their own pace, or download an MP4 video slideshow or PDF.
Post online
Embed the slides on your website or post them on social media. Upload to Microsoft Teams, Google Classroom, Moodle or any other platform.

The benefits of interactive slides
🗣️ Active participation An interactive slide deck gives your audience cool things to click on and discover, boosting learning and engagement.
👂 Multi-sensory experience Audio, video, animations, and mouse interactions make your content immersive, entertaining and accessible.
🧑🤝🧑 People-friendly format Pop-ups and embeds condense more material into fewer slides so you can break information down into digestible chunks.
🎮 Gamification Games, quizzes and puzzles make information more memorable and enable you to gather feedback and check understanding.
How to make an interactive presentation
With Genially’s easy-to-use presentation platform, anyone can make incredible visual content in moments.
Choose a template or a blank canvas

Get stunning results in less time with a ready-made template. Feeling creative? Design your own slides from scratch.
Customize the design
Add animations and interactions
Resources to become a pro presentation creator

VIDEO TUTORIAL
How to create an interactive presentation: Get started in Genially.

EXPERT TIPS
How to present data without sending your audience to sleep.

MICRO COURSE
No-code animation: Bring your slides to life with cinematic visual effects.

PRESENTATION IDEAS
The art of digital storytelling: Engage and thrill on screen.
Genially in a nutshell
How do I make a presentation interactive and how does Genially work? Find the answers to all of your slide-related questions here!
What’s an interactive presentation?
Interactive slides contain clickable hotspots, links, buttons, and animations that are activated at the touch of a button. Instead of reading or watching passively, your audience can actively interact with the content.
Genially’s interaction presentation software allows you to combine text, photos, video clips, audio and other content in one deck. It’s a great way to condense more information into fewer slides.
If you’re a teacher, you can share multiple materials in one single learning resource. Students can create their own projects using digital media and online maps. For business or training, try embedding spreadsheet data, PDFs, and online content directly in your slides.
An interactive slide deck is more user-friendly than a Microsoft PowerPoint presentation or Google Slides document. That’s because you can break information down into chunks with pop-ups, labels, voiceovers and annotated infographics.
The other benefit of interactive content is increased engagement. It’s easier to keep your audience’s attention when they’re actively participating. Try Genially’s presentation software and free slideshow maker to see how it’s better than other presentation websites. You won’t go back to standard presentation apps!
How do you make a clickable slide?
The best way to make slides clickable is to use Genially’s free interactive presentation program. Design your slide then apply an interaction. In a couple of clicks, you can add popup windows, hyperlinks, close-up images, games, animations, multimedia and other content.
Choose from the library of hotspot buttons and icons to show people what to click on. Go to Presenter View to get a preview and see how your content will appear to your audience.
How do I create presentations that look professional?
You’ve got a deadline looming and you’re staring at the screen with a blank presentation. We’ve all been there! Starting a presentation design from scratch is tricky, especially if you’re short on time.
Genially’s free online presentation maker has over 2000 ready-to-use templates for professional slide presentations, photos slideshows, and more. Each slide design has been created by our team of top graphic designers. No need to worry about fonts, centering images, or designing a matching color scheme. It’s all done for you.
Start by browsing our layouts and themes for education, business and then customize with your own text and images.
How do I share or download my slides?
Because Genially is a cloud based presentation software, you can simply share the link to your slides. Like other online presentation tools, there are no files to download or store on your computer. Everything is saved online.
When you publish your slide deck, it gets its own unique url, just like a website. Share the link with others to let them explore the content in their own time. If you’re presenting live, just click the Present button.
You can also embed your presentation on your website, company wiki, or social media. Genially is compatible with WordPress, Moodle, Google Classroom, and other platforms. If you use an LMS, you can also download your interactive design slides in SCORM format.
For slideshow videos and slideshows with music, share online or download as an MP4 video. Check out our free slideshow templates for ideas.
Can I make a free presentation in Genially?
You bet! Genially is an easy-to-use slide maker, with a free version and paid plans. The free plan allows you to create unlimited slides with interactions and animations. Subscribe to one of our paid plans for more advanced features.
Discover a world of interactive content
Join the 25 million people designing incredible interactive experiences with Genially.
Skip to main content
- Contact sales
- Get started Get started for free
Figma Design
Design and prototype in one place
Collaborate with a digital whiteboard

Translate designs into code

Figma Slides
Co-create presentations

Explore all Figma AI features
Get the desktop, mobile, and font installer apps
See the latest features and releases
- Design systems
- Prototyping
- Wireframing
- Online whiteboard
- Team meetings
- Strategic planning
- Brainstorming
- Diagramming
- Product development
- Web development
- Design handoff
- Engineering
- Product managers
Organizations
Creator fund
Build and sell what you love
User groups
Join a local Friends of Figma group
Learn best practices at virtual events
Customer stories
Read about leading product teams
Shortcut: The Figma blog
Stories about how products take shape—and shape our world

Get started
- Developer docs
- Best practices
- Reports & insights
- Resource library
- Help center
The first presentation tool built for designers and their teams.
trusted by The world’s leading teams
The power of Figma, made easy for everyone
Figma Slides makes it easier than ever for teams to co-create narratives, engage their audience, and craft impressive slide decks using the power of Figma Design.
Create presentations like a pro
Build your deck in a simple, easy-to-use interface, or toggle over to Design Mode to access Figma Design favorites like Auto Layout, the layers panel, and advanced properties.
All hands on deck
Build on-brand presentations with templates, theming, and AI-powered writing tools. Switch between Single Slide and Grid View to think visually within a structured framework.
Turn presentations into conversations
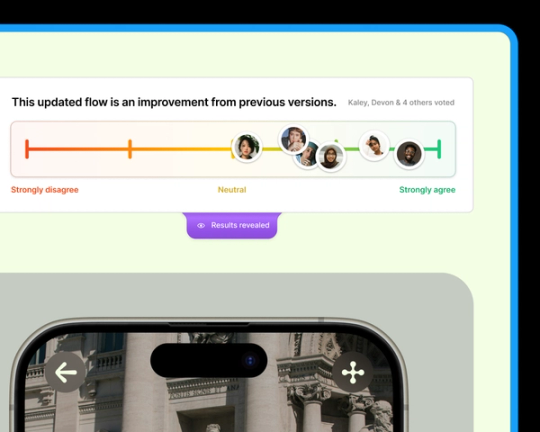
Encourage two-way conversations and drive alignment with live polls, alignment scales, and voting. Plus, you can even embed live prototypes to share design interactivity.
Six Figma Slides features we think you’ll love
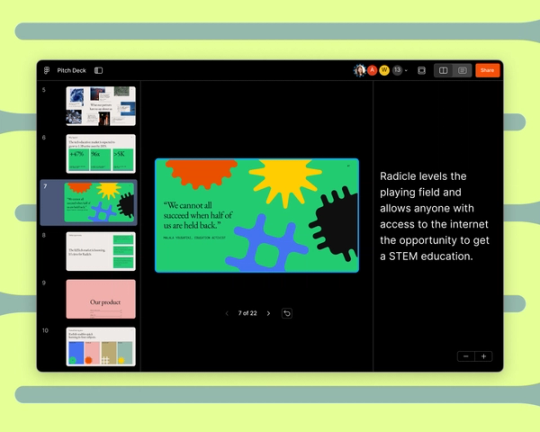
Showcase interactive designs.
Add playable prototypes to your deck to bring your products to life.
See the big picture with grid view
Zoom out to see your entire presentation from a bird’s eye view. Easily group multiple slides and move sections of your presentation.
Toggle on Design mode
Toggle on Figma Design tools for easy access to Auto Layout, advanced properties, and all of your favorite design features.
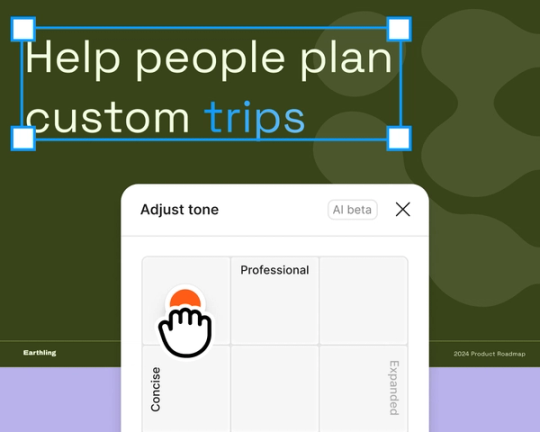
Fine tune copy in minutes with AI
Easily dial up the tone of your text to be shorter or longer, more professional or more casual.
Slide into alignment with your team
Tease out misalignment with the Alignment Scale. Quickly find out where you’re good to go, and where you need to do more digging.
Present confidently
See your presenter notes and preview the next slide—all within Presenter View. A tiny step toward getting rid of “ummms...” forever.
Get started with a stunning template
No matter what kind of presentation you’re gearing up for, we have high-quality slide templates to help you get started.
Explore all templates

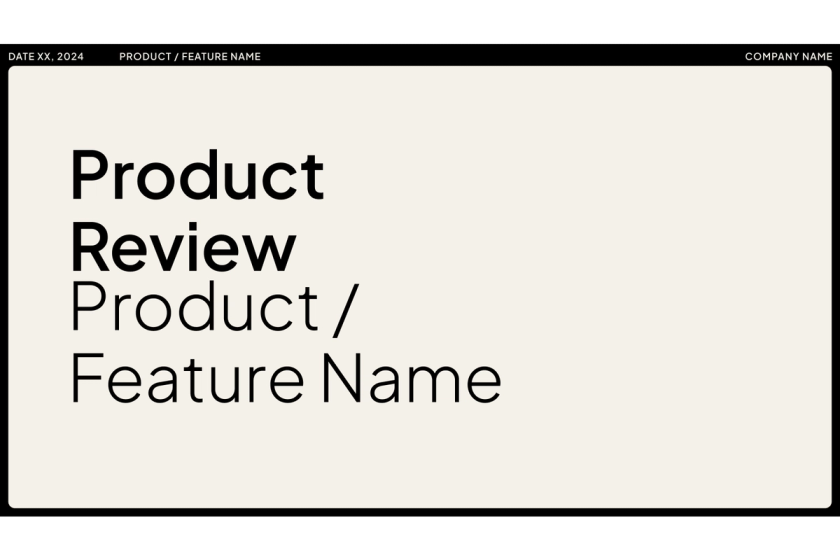
Product review
Design review
Startup pitch
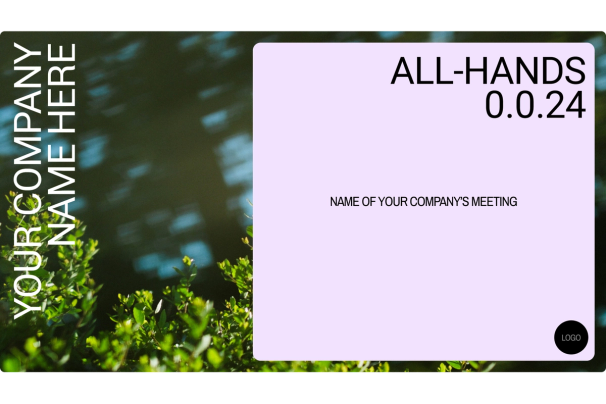
All hands meeting

Product roadmap

Research readout

Marketing strategy
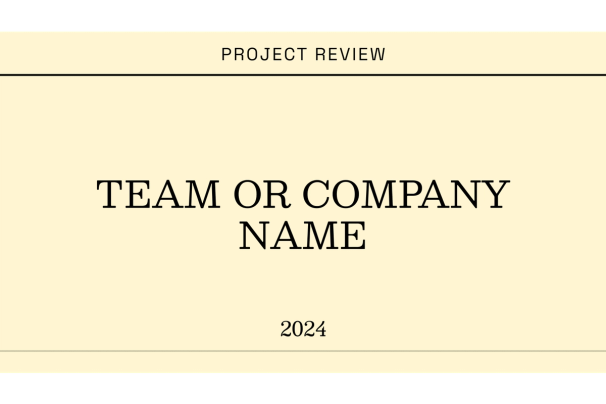
Project review
Figma Slides empowers anyone on the team to create beautiful, effective presentations.
Charmaine Lee Product Manager, Snap

Looking for more on Figma Slides? We’ve got you.

Stack the deck with Figma Slides
For presentations that actually move the needle, our new slide tool combines the power and precision of Figma with the collaborative spirit of FigJam.

Getting started with Figma Slides
Figma Slides is built for everyone. Not sure where to start? Here’s a helpful video tutorial to get you going.

Explore community presentation templates
Discover and use presentation templates crafted by the best and brightest in our Figma community.
Top searches
Trending searches

10 templates

hispanic heritage month
21 templates

indigenous canada
46 templates

49 templates

mid autumn festival
18 templates

suicide prevention
9 templates
Create your presentation Create personalized presentation content
Writing tone, number of slides, ai presentation maker.
When lack of inspiration or time constraints are something you’re worried about, it’s a good idea to seek help. Slidesgo comes to the rescue with its latest functionality—the AI presentation maker! With a few clicks, you’ll have wonderful slideshows that suit your own needs . And it’s totally free!

Generate presentations in minutes
We humans make the world move, but we need to sleep, rest and so on. What if there were someone available 24/7 for you? It’s time to get out of your comfort zone and ask the AI presentation maker to give you a hand. The possibilities are endless : you choose the topic, the tone and the style, and the AI will do the rest. Now we’re talking!
Customize your AI-generated presentation online
Alright, your robotic pal has generated a presentation for you. But, for the time being, AIs can’t read minds, so it’s likely that you’ll want to modify the slides. Please do! We didn’t forget about those time constraints you’re facing, so thanks to the editing tools provided by one of our sister projects —shoutouts to Wepik — you can make changes on the fly without resorting to other programs or software. Add text, choose your own colors, rearrange elements, it’s up to you! Oh, and since we are a big family, you’ll be able to access many resources from big names, that is, Freepik and Flaticon . That means having a lot of images and icons at your disposal!

How does it work?
Think of your topic.
First things first, you’ll be talking about something in particular, right? A business meeting, a new medical breakthrough, the weather, your favorite songs, a basketball game, a pink elephant you saw last Sunday—you name it. Just type it out and let the AI know what the topic is.
Choose your preferred style and tone
They say that variety is the spice of life. That’s why we let you choose between different design styles, including doodle, simple, abstract, geometric, and elegant . What about the tone? Several of them: fun, creative, casual, professional, and formal. Each one will give you something unique, so which way of impressing your audience will it be this time? Mix and match!
Make any desired changes
You’ve got freshly generated slides. Oh, you wish they were in a different color? That text box would look better if it were placed on the right side? Run the online editor and use the tools to have the slides exactly your way.
Download the final result for free
Yes, just as envisioned those slides deserve to be on your storage device at once! You can export the presentation in .pdf format and download it for free . Can’t wait to show it to your best friend because you think they will love it? Generate a shareable link!
What is an AI-generated presentation?
It’s exactly “what it says on the cover”. AIs, or artificial intelligences, are in constant evolution, and they are now able to generate presentations in a short time, based on inputs from the user. This technology allows you to get a satisfactory presentation much faster by doing a big chunk of the work.
Can I customize the presentation generated by the AI?
Of course! That’s the point! Slidesgo is all for customization since day one, so you’ll be able to make any changes to presentations generated by the AI. We humans are irreplaceable, after all! Thanks to the online editor, you can do whatever modifications you may need, without having to install any software. Colors, text, images, icons, placement, the final decision concerning all of the elements is up to you.
Can I add my own images?
Absolutely. That’s a basic function, and we made sure to have it available. Would it make sense to have a portfolio template generated by an AI without a single picture of your own work? In any case, we also offer the possibility of asking the AI to generate images for you via prompts. Additionally, you can also check out the integrated gallery of images from Freepik and use them. If making an impression is your goal, you’ll have an easy time!
Is this new functionality free? As in “free of charge”? Do you mean it?
Yes, it is, and we mean it. We even asked our buddies at Wepik, who are the ones hosting this AI presentation maker, and they told us “yup, it’s on the house”.
Are there more presentation designs available?
From time to time, we’ll be adding more designs. The cool thing is that you’ll have at your disposal a lot of content from Freepik and Flaticon when using the AI presentation maker. Oh, and just as a reminder, if you feel like you want to do things yourself and don’t want to rely on an AI, you’re on Slidesgo, the leading website when it comes to presentation templates. We have thousands of them, and counting!.
How can I download my presentation?
The easiest way is to click on “Download” to get your presentation in .pdf format. But there are other options! You can click on “Present” to enter the presenter view and start presenting right away! There’s also the “Share” option, which gives you a shareable link. This way, any friend, relative, colleague—anyone, really—will be able to access your presentation in a moment.
Discover more content
This is just the beginning! Slidesgo has thousands of customizable templates for Google Slides and PowerPoint. Our designers have created them with much care and love, and the variety of topics, themes and styles is, how to put it, immense! We also have a blog, in which we post articles for those who want to find inspiration or need to learn a bit more about Google Slides or PowerPoint. Do you have kids? We’ve got a section dedicated to printable coloring pages! Have a look around and make the most of our site!
How to Create a Template in Google Slides: A Step-by-Step Guide
Learn how to create custom templates in Google Slides with step-by-step instructions, tips for design consistency, and expert customization advice.
Why Create a Google Slides Template?
- Consistency : Templates help maintain uniformity in slide layouts, fonts, and colors, which is crucial for branding and professionalism.
- Efficiency : Instead of starting from scratch each time, a template allows you to begin with a fully prepared layout, cutting down preparation time.
- Collaboration : Teams working on the same project can use a single template to ensure that everyone's presentations look cohesive.
Steps to Create a Template in Google Slides
Step 1: open google slides and create a new presentation.
- Go to Google Slides and sign in using your Google account.
- Click the "+" (blank) slide button to open a new presentation.

Step 2: Access the Slide Master
- In the top toolbar, go to "Slide" and select "Edit theme" (this will open the master slide editor).

Step 3: Customize the Master Slide
- Set the Background : You can set a custom background color or image. To do this, click on "Background" and choose a color or upload an image.
- Choose Fonts : Click on the text boxes in the master slide to select fonts and adjust sizes, colors, and alignment. Ensure you're using a legible font, especially for titles and body text.
- Add a Logo or Branding : If your template needs a logo or other branded element, add it here so it appears on every slide. Simply drag and drop or use the "Insert" > "Image" function to add graphics.

Step 4: Create Slide Layouts
- Edit Existing Layouts : Click on any layout to customize it. For example, you can:
- Adjust the placement of text boxes and images.
- Change the background, font, or color scheme.
- Add placeholders for images or text that will need to be filled out later.
- Add New Layouts : If the default options don’t meet your needs, you can create new layouts by clicking the "+" icon at the top of the master editor.
- Once you create a new layout, customize it the same way you would with any other layout (adjusting text boxes, backgrounds, fonts, etc.).
Step 5: Save Your Template
- Exit the master slide editor by clicking "X" in the upper-right corner of the slide master panel.
- Save your presentation as a template by either:
- Keeping it in Google Drive and making a copy every time you need it.
- Downloading it as a PowerPoint file (.pptx) or saving it to your Google Drive for easy access.

Tips for Designing an Effective Google Slides Template
1. use a simple color scheme, 2. choose readable fonts.
- Use sans-serif fonts for body text (e.g., Arial, Lato, Open Sans).
- Use decorative fonts sparingly, only for titles or accent elements.
3. Incorporate Consistent Imagery
- Align images with text to create balanced layouts.
- If you're using a background image, make sure it doesn’t overpower the content. Use transparency to soften it if necessary.
4. Design for Flexibility
5. include slide numbers and footers, 6. test responsiveness, create ppt using ai.
Just Enter Topic, Youtube URL, PDF, or Text to get a beautiful PPT in seconds. Use the bulb for AI suggestions.
character count: 0 / 6000 (we can fetch data from google)
upload pdf, docx, .png
less than 2 min
Ayan Ahmad Fareedi
writer at MagicSlides
How to Translate Google Slides into Spanish: A Step-by-Step Guide
12 September 2024
How to Use Scribble on Google Slides: A Step-by-Step Guide
How to Upload a PowerPoint in Google Slides
11 September 2024
How to Make a Metrics Slide with AI in Just 5 Steps
9 September 2024
How to Create a Bullet Point + Image Slide with AI (with examples)
4 September 2024
Top Quotes and Wishes for Brother's Day 2024
31 August 2024
How to Generate Presentation Ideas for School: A Complete Guide
23 August 2024
What Is a Presentation Outline? A Complete Guide
Stunning presentations in seconds with AI
Install MagicSlides app now and start creating beautiful presentations. It's free!

Get AI-Generated Presentations Ready in Seconds
Free AI PPT Tools
- Google Slides Tutorials
How to Create Flowcharts in Google Slides: Simple Tutorial

Ever sat through a presentation that was just wall-to-wall text? It’s tough, right? That’s where flowcharts come in. They can transform complex information into easy-to-understand visuals, making your presentations not just informative but also engaging.
Creating flowcharts in Google Slides is easier than you might think! Whether you’re presenting a project, mapping out a process, or simply want to add a visual element to your slides, flowcharts can be incredibly helpful. In this tutorial, we’ll walk you through the simple steps to create professional-looking flowcharts in Google Slides, even if you’re a beginner.
Why Use Flowcharts?
Flowcharts help in visualizing steps in a process, making it easier to understand complex information. They are a fantastic tool for breaking down information into easily digestible visuals. They are useful in various scenarios such as:
- Project planning
- Process documentation
- Decision making
- Problem-solving
Step-by-Step Guide to Creating Flowcharts in Google Slides

Step 1: Open Google Slides
Begin by launching Google Slides and starting a new presentation. You can do this by navigating to Google Slides and clicking on the blank presentation or choosing an existing template.
Step 2: Set Up Your Slide
To set up your slide for a flowchart:
- Click on the “+” icon to add a new slide.
- Choose a blank slide layout for a clutter-free workspace.
- Optionally, you can change the background color or add a theme to match your branding.
Step 3: Add Shapes

Flowcharts are made up of different shapes that represent various steps in a process:
- Go to the toolbar and click on the “Shape” icon.
- Select “Shapes” and choose rectangles for process steps, diamonds for decision points, and ovals for start/endpoints.
- Click and drag on the slide to draw the shapes. Resize them as needed.
Step 4: Add Text to Shapes
To add text to your shapes:
- Double-click inside a shape to enter text.
- Type in the relevant information for each step of your flowchart.
- Adjust the font size, style, and color from the toolbar to make your text stand out.
Step 5: Connect the Shapes

To illustrate the flow between steps:
- Click on the “Line” tool in the toolbar.
- Select “Arrow” to draw directional lines between shapes.
- To connect shapes, click and drag from one shape to the next.
- Ensure the arrows point in the correct direction to maintain logical flow.
Step 6: Customize Your Flowchart
Enhance your flowchart by:
- Changing the color of shapes and lines to make different sections distinct.
- Adding images or icons to represent steps visually.
- Using alignment tools to make sure everything is evenly spaced and organized.
Step 7: Review and Save
Once you’re satisfied with your flowchart:
- Review it to ensure accuracy and clarity.
- Save your presentation by clicking on “File” > “Download” and choosing your preferred format, such as PDF or PNG.
Tips and Tricks for Better Flowcharts
- Keep it simple: Avoid overcrowding your flowchart with too many details. Focus on the main steps and keep it clear.
- Use color wisely: Color can help differentiate sections but don’t overdo it. Choose a consistent color scheme that ensures easy readability.
- Consistent design: Use the same shape sizes, line styles, and font types throughout your flowchart for a cohesive look.
Utilize Premade Templates and Themes

Creating a flowchart from scratch can be time-consuming. To save time and ensure a professional look, consider using premade Google Slides themes and editable flowchart presentation templates available online. These templates come with pre-designed elements that you can easily customize to fit your needs.
Creating flowcharts in Google Slides is a simple process that can greatly enhance your presentations. By following this step-by-step tutorial, you’ll be able to create clear and effective flowcharts in no time. Don’t forget to check out our blog on how to make a flowchart in PowerPoint if you’re looking for similar guidance in a different tool. For more presentation hacks, visit our tips & tricks page . Use the power of flowcharts to convey your ideas more effectively and make your presentations stand out!
Spread Love
Related blogs.

Arockia Mary Amutha
Arockia Mary Amutha is a seasoned senior content writer at SlideEgg, bringing over four years of dedicated experience to the field. Her expertise in presentation tools like PowerPoint, Google Slides, and Canva shines through in her clear, concise, and professional writing style. With a passion for crafting engaging and insightful content, she specializes in creating detailed how-to guides, tutorials, and tips on presentation design that resonate with and empower readers.
Recent Blogs

What is a PPT and How to Make Impactful Presentations with PowerPoint?
PowerPoint Presentations, commonly known as PPTs, have become an essential tool in various fields such as business, education, and even...

How to Create a Jeopardy Game in Google Slides: A Step-by-Step Guide
Jeopardy is a popular quiz game that challenges participants with answers to which they must respond with the correct questions....

Why Roadmap PowerPoint Template Best For Project Management?
Project management, at this time, will be like walking in a maze, where one becomes lost in the middle of...
SIGNUP FOR NEWSLETTER
IMAGES
VIDEO
COMMENTS
Free online presentation maker. Try our new tool to edit this selection of templates for people that want to let their creativity run free. Create interactive resources easily, quickly and without the need for any software. A really useful tool for teachers and students. Move the content, add images, change colors and fonts or, if you prefer ...
With Visme's Presenter Studio, you can record your presentation and share it with your audience. Record your screen, audio, and video, or switch off your camera for an audio-only presentation. Present asynchronously on your own time, at your own pace. Let your colleagues watch it at their convenience. Create Your Presentation.
Six steps for creating a slide show. 1. Plan your slide show. Before getting too deep into your slide show project, it's a good idea to select and save the photos and videos you want to use. This helps you create a slide show more efficiently and purposefully, ensuring a better outcome. 4.
Create stunning presentations with Google Slides. Discover slide templates for every use case, use AI to generate unique visualizations, and more.
Create a presentation. Open PowerPoint. In the left pane, select New. Select an option: To create a presentation from scratch, select Blank Presentation. To use a prepared design, select one of the templates. To see tips for using PowerPoint, select Take a Tour, and then select Create, . Add a slide.
Move slide—Drag the slide to a different position in the presentation. To move several slides at once, Ctrl+click multiple slides before dragging them. Delete slide—Right-click the slide and select Delete. Duplicate slide—Right-click the slide in the sidebar and select Duplicate slide.
To create a new Google Slides presentation, open a web browser and go to Slides.Google.com. If you want to start from a template, you can choose one from the template gallery. Otherwise, click "Blank" to create a new blank presentation. Your blank presentation starts with a single simple slide with space to enter a title and subtitle.
Free online presentation maker. Choose from our presentation templates to design your own in minutes or easily import your slides into the presentation maker to edit. Customize your slides with tons of design assets, templates, and powerful generative AI tools at your side. (To pull in manually curated templates if needed) (Horizontal/Vertical ...
Join over 2 million creators. Slides is used daily by professionals all over the world to speak at conferences, share pitches, school work, portfolios and so much more. Join today and try it out for free. Slides is a place for creating, presenting and sharing modern presentations. Sign up for free.
How to Make a PowerPoint Presentation. Open the PowerPoint app, select a template and theme, then like "Create.". Click the text box to add your title and subtitle to create your title slide. Click the "Insert" tab, then "New Slide" to add another slide. Choose the type of slide you want to add, then add text and pictures.
Share and collaborate. Start with Microsoft Copilot. Generate a presentation outline instantly with Microsoft Copilot for Microsoft 365. Expand your ideas. Ask for more information or a new slide on your topic directly through Copilot in PowerPoint. Use a free template. Choose from thousands of customizable templates to kickstart your slideshow.
Create clickable presentations and slide decks with animation, infographics, multimedia and beautiful design. Easy to use. 1000+ templates. ... The best way to make slides clickable is to use Genially's free interactive presentation program. Design your slide then apply an interaction. In a couple of clicks, you can add popup windows ...
Download the Branded Content Minitheme presentation for PowerPoint or Google Slides and start impressing your audience with a creative and original design. Slidesgo templates like this one here offer the possibility to convey a concept, idea or topic in a clear, concise and visual way, by using different graphic resources.... Multi-purpose.
Create an interactive presentation in minutes! Get started, it's free. Add impressive slides to your meetings and classes with Mentimeter's free online presentation maker. Create your first presentation and start engaging your audience today!
Free PowerPoint and Google Slides Templates for your Presentations. Free for any use, no registration or download limits. Featured Slide Themes. Editor's Choice Popular Ready-to-teach Lessons Earth Philosophy Pop Culture Apple Teacher War Politics Game Posters Recent Slideshow Templates. Canva. 3.6.
Figma Slides makes it easier than ever for teams to co-create narratives, engage their audience, and craft impressive slide decks using the power of Figma Design. Create presentations like a pro Build your deck in a simple, easy-to-use interface, or toggle over to Design Mode to access Figma Design favorites like Auto Layout, the layers panel ...
AI presentation maker. When lack of inspiration or time constraints are something you're worried about, it's a good idea to seek help. Slidesgo comes to the rescue with its latest functionality—the AI presentation maker! With a few clicks, you'll have wonderful slideshows that suit your own needs. And it's totally free!
Set the Background: You can set a custom background color or image.To do this, click on "Background" and choose a color or upload an image.; Choose Fonts: Click on the text boxes in the master slide to select fonts and adjust sizes, colors, and alignment.Ensure you're using a legible font, especially for titles and body text. Add a Logo or Branding: If your template needs a logo or other ...
Begin by launching Google Slides and starting a new presentation. You can do this by navigating to Google Slides and clicking on the blank presentation or choosing an existing template. Step 2: Set Up Your Slide. To set up your slide for a flowchart: Click on the "+" icon to add a new slide. Choose a blank slide layout for a clutter-free ...